

Hells Warrrior
-
Posts
4,117 -
Joined
-
Last visited
-
Days Won
81
Content Type
Profiles
News & Announcements
Zombies Library
Easter Egg Guides
Intel
Forums
Everything posted by Hells Warrrior
-
Resurrecting old posts (this one is 7 years old), is frowned upon. Please refrain from doing so. Create a new post should you wish to discuss a topic.
-
Let's find out @Ehjookayted did you? How about you @Jolteon?
-

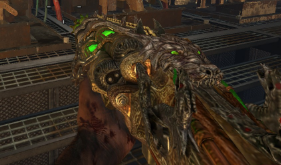
"Nine Eyes" Holds the Key to Richtofen's Master Plan
Hells Warrrior replied to Faust's topic in Asylum
-
"Nine Eyes" Holds the Key to Richtofen's Master Plan
Hells Warrrior replied to Faust's topic in Asylum
@NaBrZHunter -
An Invincible crew for a 'Five' esque Map
Hells Warrrior replied to NukaColaClear's topic in General Zombies Discussion
@NaBrZHunter -
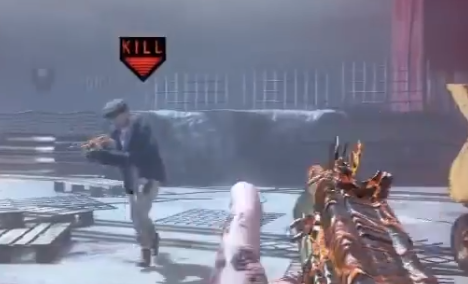
 To complete the Quest, you will need the Wunderwaffe DG-Scharfschutze, a dynamite bomb, and the Samantha's Music Box. Winter's Wail is recommended in the modifier slot but not absolutely necessary. Turn on the power switch in the spawn room. Interact with the Hermit in the Lighthouse 4th floor Melee a blue rock in the Lighthouse Approach. You must find and fully complete two of the Hermit's challenge totems. These totems are located in the Lighthouse Station, the Frozen Crevasse, the Beach, Specimen Storage, and the Forecastle. My recommended challenges for ease and speed are the Forecastle and the Frozen Crevasse's challenges. Frozen Crevasse Challenges- 1. Defeat 20 enemies while standing in freezing water. 2. Shatter 6 zombies after they have been completely frozen. Running into their frozen bodies or shooting them will do the trick. 3. Play the Hermit's favorite tune. The Hermit will hum a tune in musical notes of A C E G. Hit the bells in the order of his hums. Forecastle Challenges- 1. Defeat 25 enemies while standing still. 2. Defeat 10 enemies with melee attacks. 3. Find Soup ingredients, add them to the pot at the Forecastle, and add water. 1. The ingredients for the Soup will be at the Gangway, the Beach, and the Boathouse 2. The pot is at the far end of the ship, on the side of the forecastle. 3. Adding water can be done by throwing snowballs into the pot. Lighthouse Station Challenges- 1. Defeat 25 enemies with headshots and collect their brains. 2. Defeat 20 enemies with the Shield's melee. 3. Pick up the Hermit's pee jars next to the dumbwaiter/reward boxes and deposit them into the water in the Beach. Beach Challenges- 1. Defeat 13 enemies with snowballs. 2. Defeat 15 enemies with the Lighthouse trap next to the challenge totem. Power must be on, and the blue rock must be given to the Hermit in order to activate this trap. 3. Complete SOS messages around the map. This can be done by throwing snowballs into missing parts of letters in the SOS symbol. The SOS symbols are located on the Lighthouse, on the boat next to the Beach, and on the Boat next to the Sunken Path. Specimen Storage- 1. Fling 15 zombies. The Flingers must be repaired first, by bringing the broken power boxes to the Hermit for him to repair them. 2. Defeat enemies while riding on a zipline. 3. Complete the Whack-A-Mole station at the Loading Platform at the Facility using snowballs. After fully completing two of these challenge totems, the Hermit will trust you and give you a tool capable of 'communicating with otherworldly entities.'
 -
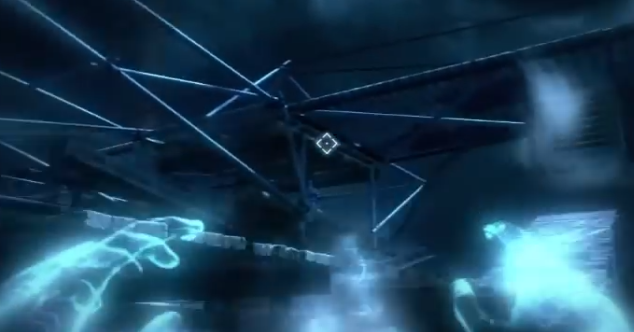
 Go to Nero's altar above Easy Street and interact with an open book on the ground near the bookshelf. It should then start floating into the air. A flag should appear in the Subway Station. You will need to carry this flag around the map and place it in set locations that appear to be sparking from the ground. There are two sparking locations leading to each ritual location. When the flag is in play, Insanity Elementals (Meatballs) and Parasites will spawn infinitely. Your goal is to place the flag down at a sparking location near the entrance to each area, protect the flag from Meatballs, and then once it is glowing red you can grab a max ammo and move to the next location in that area, moving towards the altar. After a second defense, you will place the flag at the altar. You will do this four times, once for each ritual location. Use the Civil Protector and Apothican Servant liberally as the Meatballs move fast. The Parasites will only attack you, and the Shadowman will appear, but actually does nothing to the flag so do not worry about him.
 -
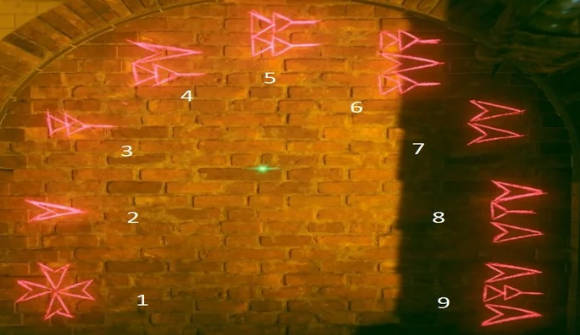 To progress further into the Easter Egg, all four players will need to acquire and upgrade Apothicon Swords. Start by taking the train from the Waterfront District to the Footlight District. If you are facing the direction of which the train is going, go to the right windows and look out them the ENTIRE train ride. You will see two glimpses of cuneiform code glowing red inside the building windows. These can easily be missed so be sure to jot them down (as the images change per game, but not the locations). There are a total of two on this ride. After you found those, take the train from the Footlight District to the Canals District, following the same procedure. This time, only one cuneiform symbol will be seen. You should have all three symbols written down or memorized. (Note: If you cannot find the symbols, consult this map which shows where roughly the symbols should be.) Here are the possible symbols. Go down into the subway and activate Beast Mode. To your right will be a brick wall displaying several red cuneiform symbols. Zap the three symbols in any order to reveal the sword holsters. In human form, take the egg from the sword holsters. You must now charge the egg four times in four different locations by killing zombies. These four locations are Cthulhu statues hidden inside boxes that must be broken in Beast Mode. One is in the subway directly across from the egg you just grabbed, one is in Canals near the back, one is in Footlight on the ground underneath the perk machine, and the one in Waterfront is in the room just past the perk machine. The egg must be placed on each statue and have zombies killed near it until it starts glowing. Once the egg has been charged fully, take the egg back to the sword holster in the subway and place it. Obtain your sword. Now you must upgrade your sword. Take note of which character you are and which ritual altar your character belongs to. Nero belongs at Easy Street, Jack Vincent belongs to Canals District, Jessica belongs to Footlight District, and Floyd belongs to Waterfront District. Return to your character's ritual altar and accept the Arch-Ovum a ghost Keeper is offering. There are four glittering red circles around the map that you can now interact with to charge your Arch-Ovum. One is just outside the gate at spawn, one is just outside the Ruby Rabbit at Canals District, one is just outside the Burlesque in Footlight District, and one is just outside the Boxing Gym at Waterfront District Simply place the egg on a red circle and kill the Margwas that spawn. You must do this at all four locations, and it can only be done once per round. Multiple players can do this in one round, but not at the same time. Once each spot is done, go back to your character's altar and the spectral Keeper will finally give you the upgraded sword.
 -
 NOTE: For Apocalypse Averted, you will need four players. In order to unlock Pack-a-Punch and begin Apocalyse Averted, you must first perform all four rituals. Before you can perform any ritual you will need: The Summoning Key (Spawn area) Become the beast, then smash the crate on the back of a truck in the spawn area. When you return to human form, you can grab the key. Now you must collect four ritual items, one associated with each area of the map: Lawyer's Pen (Easy Street, just outside spawn) Become the beast and shock a box on the crane in the middle of the map. The crane drop a box containing the pen. Collect once you are human and you can perform the Easy Street ritual. Police Badge (Canal District) Become the beast and shock a box located at the end of the canal away from spawn. Then, run to the opposite end of the canal and there should be a box in a small section of the wall that you can break. Collect once you are human and you can perform the Canal District ritual. Hair Piece (Footlight District) Become the beast and activate the stairs or grapple to the top floor, then jump over onto the ledge across form the perk machine and smash the crate. Collect once you are human and you can perform the Footlight District ritual. Championship Belt (Waterfront District) Become the beast and grapple onto the hook above a balcony in the middle of the area. Knock down the crate and collect once you are human. You can perform the Waterfront District Ritual. With the Summoning Key and a ritual item, you can now perform a ritual: Rituals For the Easy Street ritual, grapple up to the balcony above spawn and travel through the building to unlock the stairs in spawn. With the Summoning Key and Lawyer's Pen, approach the altar in the middle of building and place them both down. Stay alive as Keepers attack you until the screen flashes, and then you can grab a Gateworm on the altar. For the Canal District ritual, grapple up to the balcony at the Ruby Rabbit and head downstairs to unlock a staircase leading outside. With the Summoning Key and Police Badge, approach the altar on the top floor and place them both down. Stay alive as Keepers attack you until the screen flashes, and then you can grab a Gateworm on the altar. After your second ritual, a Margwa will spawn. For the Footlight District ritual, grapple above the entrance to the Black Lace Burlesque and shock a box behind the entrance sign. With the Summoning Key and Hair Piece, approach the altar on the stage and place them both down. Stay alive as Keepers attack you until the screen flashes, and then you can grab a Gateworm on the altar. For the Waterfront District ritual, break the door to the Boxing Gym. With the Summoning Key and the Championship Belt, approach the altar in the boxing ring and place them both down. Stay alive as Keepers attack you until the screen flashes, and then you can grab a Gateworm on the altar. After your final ritual, a Margwa will spawn. Finally, head into one of the rifts in Canals, Footlight, or Waterfront by breaking a door in beast mode and opening the rift with the Summoning Key. Approach the wall at the back of the subway area and wait for it to open. Place a Gateworm is the two goblets, one to your left and one to your right. Two walls on either side should then form where you can wall-ride across the gap to the other side. Place the last two Gateworms in the goblets in the center. Head over to the altar near the entrance and place the Summoning Key. Survive as Keepers attack you until the screen flashes. The Pack-a-Punch is now available.
 -
 The final step is to kill Weasel or for Weasel to kill all other players. Which ever happens, Pop Goes the Weasel will unlock, and the game will end.
 -
 Do not refuel the plane for another trip! Have all players enter Afterlife just below the roof, in the Infirmary, then jump on to the plane's wings on the rooftop. When your team reaches the bridge, revive your bodies in the electric chairs.
 -
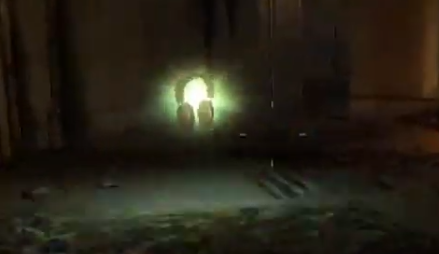 This step can only be done after step six. Collect all audio logs on the way to the rooftop. The audio logs look like Power-Ups, but they're in the shape of headphones. Audio File Locations The steps leading from the spiral starway to the top level of the Citadel Tunnels. In the center of the room that has Double Tap. In the center of the Cell Blocks. On the same floor as the wolf head. Right after the steps that lead to the wolf head from the Warden's Office. In the Infirmary directly in front of the door that allows access from the top floor of the Cell Blocks. In the doorway that leads to the Roof.
 -
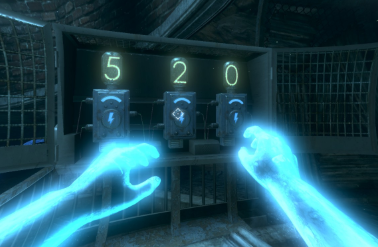 This step can only be done after flying the plane to the bridge three times. After that has been done, head to the Citadel Tunnel's massive spiral staircase. Specific numbers must be entered in the three volt meters at the bottom. It's nearly impossible to enter all four numbers in one afterlife, so get a teammate to revive the downed player, and have another teammate finish the number sequence when the first teammate falls. These numbers are: 101 872 386 481
 -
 Before you build the upgrade the Blundergat, should first obtain the Blundergat. You can do this in two ways, the Crystal skulls or from the Mystery Box. The Blundergat can be upgraded to the Acidgat by building an Acid Gat Kit on one of the Workbenches in the prison. The three parts for building the kit are located in the starting area of the Cell Blocks (near the library), the Infirmary, and the Warden's Office. Briefcase Locations Location 1 (Cell Blocks near library) Location 2 (outside canteen, next to Afterlife switch) Location 3 (As you exit Wardens Office, under the stairs straight ahead) Engine Locations Location 1 Wardens Office (Straight ahead, as you enter wardens office on the right) Location 2 Wardens Office (Turn left immediately as you enter the wardens office) Location 3 Wardens Office (In mainroom, next to fireplace) Acid Vial Location 1 (Infirmary, next to the bathtub) Location 2 (Infirmary on table next to the bathtub, the golder spork comes from) Location 3 (Infirmary, In hallway where you access roof in Afterlife) Craft all three parts on a table, then put the Blundergat on the table to turn it into the Acidgat. This is tied in with the Acid Drip achievement / trophy. We recommend on the workbench on top level, which takes you towards the gondola to the docks.
 -
 For this step, players must retrieve five skulls around the map with the Hell's Retriever. The skulls can be seen when in the Afterlife. If your team is having trouble locating the exact position, have one player go into the afterlife and shoot electricity at the location. It seems the skulls do not have to be collected in a specific order, but it's best to retrieve the one in the warden's office last. Cell Blocks Skull One skull is located in a cell just outside the library. A skull is on a shelf, but you need to aim the Hell's Retriever at the toilet. Throw it to retrieve a skull. Roof Skull One skull is located on the rooftop. Head to the left side of the roof where there are no obstructions from looking over. Throw the Hell's Retriever slightly towards the corner of the rooftop that's jutting out. Docks Skull 1 One skull is located at the top part of the docks near Jugger-Nog. Throw the Hell's Retriever at the lamp post (street light, whatever) that's above the entrance / exit to the docks. Docks Skull 2 One skull is located at the bottom of the docks. Look over to another dock to the right of the tower trap. Throw the Hell's Retriever on the third wooden pillar to obtain the skull. Warden's Office Skull One skull is located on a power line outside the Warden's Office. Look out the window to the right of the Speed Cola machine to see the power lines across the street. Throw the Hell's Retriever towards the left part of the wooden + on the power line post. It's best to get this skull last because a Blundergat will appear out of the desk in this room after all skulls are collected.
 -
 Two spoons must be retrieved around the map. The Hell's Retriever will be necessary before these can be obtained. Cell Block Spoon This Spoon is located one or two cells down from the Warden's Office. Use the Hell's Retriever to rip the poster down inside the cell, revealing an afterlife emblem behind it. Enter the afterlife and go through the blue door opposite the Warden's Office door. A spoon should be on the floor inside this area. Zap it with some electricity until you hear a laugh. Cafeteria Spoon This spoon is located behind the barricade window at the back of the cafeteria. Aim the Hell's Retriever at the spoon on the food cart on the left side of the window. There are three bath tubs in the Infirmary. Two of these tubs are in the same room and the third is by itself. You will be using the tub in a room by itself for this step. Stand by the Bathtub. Press and hold down your action button. A spoon will appear and begin stirring the blood in the tub. Continue to hold down the action button until the spoon goes completely into the blood. Stop pressing the action button. Kill Zombies in the Shower with the Acid Gat This step is exactly as it sounds. Go to the Showers and kill zombies with the acid gat. This normally takes between one and two rounds. You can use the regular Acid Gat, or the upgraded Acid Gat. When you have completed this step you will hear laughing similar to the laughing you heard when you zapped the spoon. You can do all the previous steps before you have the Acid Gat, but will not be able to complete this step without it. Take the Golden Spork After you have completed the previous steps you will need to go back to the bath tub in the Infirmary that you stirred earlier press action next to the bathtub to collect the golden spork.
 -
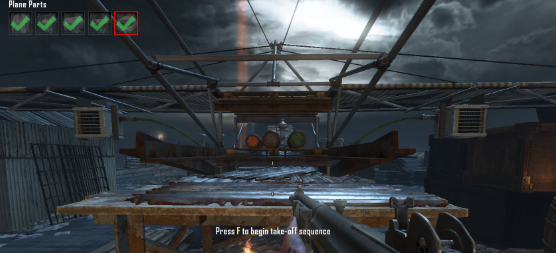 The plane will take all players that get on the plane to the bridge. After the electric chairs appear on the bridge, use them to return to the Prison. This needs to be done three times before step six. After flying the plane, it must be refueled before used again. Fuel will be located where the plane parts previously were. To build the plane, you need to do the following steps Get the Warden's Key The Warden's Key is on a hook above the Warden's Office or above the Showers. To get it, one player must enter the afterlife, jump through the blue door above the office's door or above the Showers, and overcharge the generators. If it's above the Warden's Office, don't forget to charge the volt meter to open the door, as well. Overcharging the generators will lower the key, allowing any player to grab it for the entire team. The Key opens select locks around the map. Get the Plane Parts There are a total of five plane parts around the map. These parts can be collected in any order and built on the middle of the roof. It can even be done on solo! For those that don't know how to open the roof, head to the Infirmary and enter the Afterlife. Go through the blue door around the tiled hallway and follow the path up to the rooftop. Charge the volt meter near the door to gain access to the roof. The parts are listed below in sub sections: Tanks This part is located at the bottom of the Docks. To the left of the M1927 is a locked gate. Use the Warden's Key to open this gate. On the other side is a Volt Meter and another locked gate. Have someone enter the Afterlife and charge this meter, then have another player enter the gate and pick up the part. Rigging This is located inside the elevator in the middle of the spiral staircase in the Citadel Tunnels. This particular tunnel is just before the Docks. One player must enter the Afterlife and walk from the top to the bottom. A random set of numbers will appear on the walls on the way down, so the player must remember which numbers appear. At the bottom of the staircase are three volt meters locked in a box. Use the Warden's Key to unlock the box, then charge the meters when in the Afterlife to change the numbers above each meter. Match the numbers with the numbers on the wall to lower the elevator. Head down to the elevator to pick up the Rigging. Engine This part is located in the Warden's Office, but it won't be so easy to get. The gate it's behind is electrified. You will need to shut off the power before the Warden's Key can be used. To turn off the power, head down to the generator room near the docks. When there, enter the Afterlife to walk through a blue door to a smaller room. Overcharge the generator in the room, then overcharge two more highlighted generators in the main room. This should shut off the power to the door in the Warden's Office, allowing you to grab the Engine. Uniforms This part is located in the Showers room. At the end of the room is a gate that must be opened with the Warden's Key. When open, charge the Volt Meter to turn on the power to the washing machine. Interact with the machine to turn it on. When the cycle is done, interact with the machine again to get the Uniforms. Control Valve This part is located in a green, glowing box in the Infirmary, right before the Roof. Simply use the Warden's Key to open the box. Build the Plane After grabbing a part, it can be built on the ramp in the middle of the roof. Remember, to get on the roof, head to the Infirmary and enter the Afterlife. Go through the blue door around the tiled hallway and follow the path up to the rooftop. Charge the volt meter near the door to open it. Get the Hell off the Island! Once the plane is built, have all players interact with the plane from the back to get on. If they don't do it quick enough, they will miss the ride and the achievement / trophy! The plane will fly to the bridge where the Pack-A-Punch Machine is located. Optional Step 5: Return to the Island If you wish to go back to the Island, use the Electric Chairs that will appear on the bridge. Don't worry, all weapons and perks will remain intact. Return to the Bridge If you wish to return to the bridge again, the plane can be refueled by collecting fuel tanks at the same areas the five plane parts were located. This can be done as many times as you like.
 -
 Feed the three hounds around the map. The dogs are located at the following locations, kill zombies in their proximity. Hound Locations 1) Cell Block 2) Infirmary 3) Docks Once all dogs have been fed, you can grab the Hell's Retriever in the Citadel Tunnels. All players in the game can grab it if they want.
 -
 Near the metal, there should now be a glowing circle, or orb, on the ground. To complete this step, you will need: a Gersch Device, an upgraded Raygun, an upgraded Thundergun, and Matryoska Dolls. Have the player with the Gersch Device throw it on the orb, and then you will need at least 2 Zeus Cannon and 2 X2 Ray Gun shots directed at the light, as well as 1 or 2 Matryoska Dolls. From there, the light should begin to ascend. The steps should now be completed and each player will be equipped with a Death Machine for 90 seconds and the screen will go black and white for a few seconds while Sam throws a fit, then the color will return and the Easter Egg is officially over!
 -
 In the sky, you can see several floating letters that must be retrieved. You can get them by using the Lunar Landers, and they must be gotten in an order that spells LUNA. Below is a map as to where the letters are and how to get them, but for simplicity, take the lunar lander to the starting position in the building with Quick Revive and we can start from there. Note that you CANNOT buy the landers to go to a spot, they must be called there by another player. Here is the order: L: Have a player standing on the lander and a teammate call them from the Stamin-Up lander, this should get an L. U: Have a player standing on the lander and a teammate call them from the spawn lander position, this should get a U. N: Have a player standing on the lander and a teammate call them from the Speed Cola lander, this should get an N. A: Have a player standing on the lander and a teammate call them from the Stamin-Up lander, this should get an A. At this point, Node 4 of the Easter Egg should be completed. Back at the metal chunk near Stamin-Up, 4 lights should appear as lit up on the metal.
 -
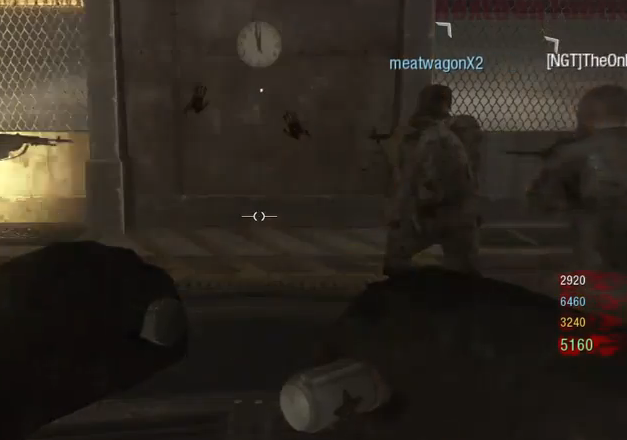 Once you get the Pack-A-Punch area opened up, have one player lead your crawlers to somewhere near Stamin-Up and get all the players gathered at the launch pad in the Pack-A-Punch area. You will see a clock on the wall that reads 12:00, and you must stand on the pressure plate in front of the clock. The plate is quite large so don't worry about falling off, but it is preferred to stand still or stay in a generally close area. You must stand on the plate for 2 minutes, but can shoot or throw grenades in case the crawlers get close and must be killed. After the two minutes is up, there will be a nuke that goes off and ends the round. At this point, Node 3 of the Easter Egg should be completed. Back at the metal chunk near Stamin-Up, 3 lights should appear as lit up on the metal.
 -
 During a Monkey round, have one of your players at each of the following perk machines: Speed Cola, Juggernog, Stamin-Up, and PhD Flopper. When the monkeys appear, there will a small red button that appears near each perk machine that must be pressed at the same time. The locations of the buttons are as follows: 1. On the right side of the door frame, while the perk machine is on the left. 2. Directly behind you when looking at the Juggernog perk machine. 3. Left of the Stamin-Up perk machine. 4. On the wall left of the PhD Flopper perk machine. At this point, Node 2 of the Easter Egg should be completed. Back at the metal chunk near Stamin-Up, 2 lights should appear as lit up on the metal.
 -
 Go to the Lunar Lander that is next to Stamin-Up and when facing it, turn to the left and you should see a staircase with a barrier on top of it. Under the staircase there will be a TV that has static on it. Go up to the TV and you should again hear a high-pitched noise. When in front of the TV, press the action button, in which the TV will get an Illuminati logo on it. At this point, Node 1 of the Easter Egg should be complete. In between Step 2 and the Claymores on the other wall, there is a big chunk of metal. When looking at it from the Claymores, 1 light should appear on the metal.
 -
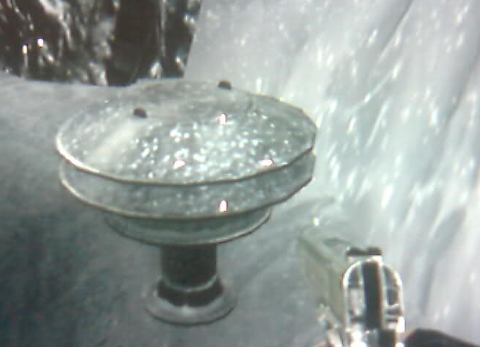
 After you do the last step for Co-Op and Solo, there will be a green light that appears. You will have to go the box as many times as you need to and get a V-R11, and shoot a zombie with it. Preferably, do it while in the light house and when he gets sucked into the green light, shoot him as much as possible until his body goes limp meaning he is dead. He will float to the top of the lighthouse and the golden rod will drop down to the bottom if he is dead. Go back to the same air tube you put the vodka in and insert the rod. The electrical box on the right will begin to short-out again and you will need to knife it, and that's it! You will get the Wunderwaffe DG-2 and then you can use it as long as you would like until it runs out of ammo!
 -
 There are 4 fog horns that need to be hit in close intervals of each other in an exact order. This is the order: 1: On the ground entrance into the lighthouse, take a right and go down the hill to the water. Behind some rocks on the left when looking at the water is where it will be. 2: Take the slide down the lighthouse and into the Speed Cola tunnel, and when you exit the tunnel take an immediate right. 3: On the ground entrance into the lighthouse, take a right and go up the hill to the bridge. To the right of the bridge is where it will be. 4: Take the slide down the lighthouse and into the Speed Cola tunnel, and then go straight out and wade through the water until you get to the rock on the right. There will be a slight bend and it will be right behind that rock.