

InfestLithium
-
Posts
4,878 -
Joined
-
Last visited
-
Days Won
132
Content Type
Profiles
News & Announcements
Zombies Library
Easter Egg Guides
Intel
Forums
Posts posted by InfestLithium
-
-
Really hoping good things for BO6.
Terminus looks like the traditional Zombies we've been wanting with a more modern system/feel. It's refreshing.
Liberty Falls...I'm worried will be another MWZ. Based on the recent media we got, it looks like 3arc listened about the poor UI and design elements, but kinda thinking it'll still pale in comparison to Terminus. Probably meant that way to appease large-environment players (those who enjoyed Outbreak in CW) and old-school players with Terminus.As far as Gobblegums go, I really hope they get more artistic liberty with them like the Whimsical GGs we saw in BO3. Might not mean much but it was playful and brought fresh blood to super long matches. At least IMO.
-
 1
1
-
-
@RadZakpak I'm super excited to see how this pans out! I love that you're dissecting it into installments of [basically] the games in how we perceive them. Should be totally easy to understand and follow, especially with your writing prose.

-
Chapter 2 really has that enticing imagery going on...and I'm a sucker for
medievalimagery.
Also, noticed an error in Chapter 2:
Quote“Is Hilda the reason your are so forlorn, Doctor?”
Just being a little grammar Nazi zombie, that's all.
-
1
-
-
I saw that little burn in there, don't think I didn't catch that, haha.
But seriously, first FIVE chapter was awesome!
-
Gotta say friendo, your writing has vastly improved since you originally started. It's like having a Camaro but upgradingto an Aventador - glorious reading, and very succulent on the imagery/narratives! Also, your backstory insight on the characters without over doing it is incredible.
Can't wait to see how you transition FIVE and Ascenion! ?
-
What a way to end this off! Love the Morg City story. Just a few minor irks though:
Chapter 6 has some missing words and errors grammatically from the beginning to middle of the chapter. I'm on mobile and can't flip back on forth, so excuse the hastiness.
Also, Jessica Rose performed at the Black Lace Burlesque but it keeps being written as the Ruby Rabbit. The Ruby Rabbit was actually the "strip club" of Morg City whereas the burlesque is where Jessica performs/the lounge where each of the featured stars meet up for the first time before being cursed.
Regarding Chapter 7...not sure if that's where the reporter dies (the alley). While it does make up for the suspense most definitely - and oh boy did you really make that a climatic buildup by the way - we know the reporter's corpse is instead found in the Footlight District in one of the shop windows. I guess the cursed version of Morg City we play in changes the location of his body, but I wasn't sure if you had that in mind when depicting where the reporter would die at?
-
I think the easiest way to compare is to match the accents of the Mobsters to the Reporter. Because if we know the mobsters to have been based in SF and acknowledge their presence in Morg City, that would evidently link Morg City near the SF area no?
The mobsters' voice actors probably didn't put too much emphasis on accents - just used their normal, but slightly more abrasive, dialect.
-
Compeltely in love with the Morg City stories! Really pulls you into the limelight and premier of the city before becoming corrupted. Fantastic storytelling as always, @RadZakpak!
I do have a question about Chapter 2 of it: http://www.callofdutyzombies.com/story/morgcitych2/
I know @PINNAZ found the "Cursed" promo image Treyarch made to be the Chicago skyline, but I was curious to see as if Morg City were also based around Chicago? In this chapter, it seems like Morg City was within vicinity of San Fracisco. While it only make sense because the MotD mobsters were based in SF, I just wanted clairty on if you thought that same thing when making the two cities within close proximity?
-
1
-
-
Finally, now we're getting into Black Ops territory.
The best part. (Also, like the MTD/MDT reference!)
-
Question about Chapter 12:
fFor the Fly Trap to activate, didn't it take a PaP'ed weapon to start the event? I could be wrong though since I only remember the BO remastered classic maps...not sure if a grenade worked in WaW.
-
Definitely looks like an inspiration from it! You kinda get the feeling that Treyarch wanted to revive the One Inch Fist from "Origins" but didn't know how...until now. And considering that they take inspiration from many films, there seems to be no secret that they wanted to aim for a design like this.
While this device probably doesn't open a portal per say in Zombies, it really delivers in power and will 100% be utilized for the Easter Egg. Great connection!
-
2
-
-
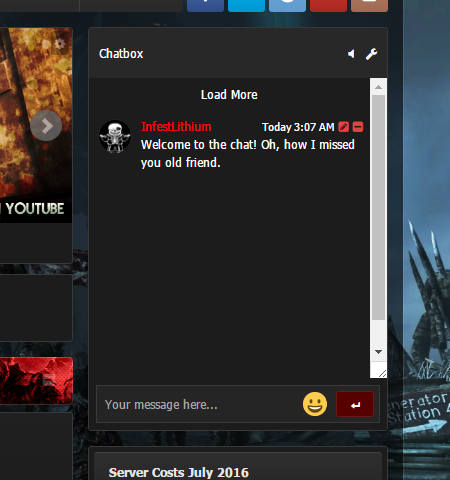
Simply put, we've implemented a more lightweight chatbox by popular demand. As with our old chatbox, each reply is subject to the Code of Conduct on this forum. This is in no way to replace our Looking For Group module (LFG) - and as such, should only be used as a small chit-chat area.
Abuse of the chatbox will lead to it being left in the Rift...although you wouldn't do that, would you?
-
5
-
-
Must be something wonky with the site layout. We'll get to fixing it.
For now, I've reset your layout preference to default. Let me know how that works out for you.
-
Back in the good ol' days of the Internet, Flash games overtook the web by storm. Despite how generic and old they were, we simply couldn't stop playing the. Hell, even as little school students, we'd find ways to play our favorite Flash games on those heavily-firewall'ed school computers!
It's time to relive that childhood with our own Arcade.
http://www.callofdutyzombies.com/arcade/
Our new Arcade will feature classic Flash games and be continuously updated monthly with more new games for your enjoyment! Unlike the old arcade we used to have, high scores won't automatically be saved...however, you can leave a comment/review on the games themselves and post your score to compete with other members!
Because we'll keep on updating our gaming database, there'll never be a dull moment while waiting around the forum for new posts and content. Happy gaming, friendos!
-
2
-
-
Welcome to the family, friendo!
-
Despite seeing you around everywhere, just figured that you need an official "welcome to the family, friendo!" comment.
-
1
-
-
Shadow Clawis going to be the new Blasstic Knife?
Here's to hoping!
-
1
-
-
Welcome to the community, friendo! ?
-
Exo-Zombies gameplay-wise wasn't really all that bad. I know Sledgehammer tried their best to follow in the footsteps of Treyarch's Zombies, with the story concept, "wonder weapons", and intricate side quests.
Unfortunately, it was pretty lackluster because they just couldn't figure out how to ramp themselves up while distinguishing their mode as its own marvel. The story elevated into DLC 3 but it was too late - nothing about it kept the player wanting to learn more about the outbreak and what entailed afterwards.
The quests were just very odd to do in terms of steps, and the final "rewards" weren't all that wonderful either. I will give them credit though, because their steps were pretty puzzle-like which made completing it feel like...like an actual quest up until near the end?
If anything, the mode is overall hectic. Which I personally enjoyed a lot because it always forced you to stay on your toes. You could still train around like any other Zombies-esque game; however, their AI movement was very irregular and some zombies like the EMP-zombies made is 20x harder to navigate the same way all the time. Because of this, you really had to plan out your exit strategies if shit hit the fan.
Overall, could definitely use more work. But if Sledgehammer chooses to make another Exo-Zombies, they need to do more studying.
-
1
-
-
Welcome to the community, friendo!
-
52 minutes ago, Rissole25 said:
Video is private.
https://gyazo.com/85a95446293c8be462bb8f15895d7e87
Maybe it was set to private at the time? Try it now friendo.
-
With an accumulated 21 hours of rendering and uploading, the interview with @RADAUSTIN27 has been uploaded! This is definitely work the listen, since Reed had nothing but wonderful things to say about everything Zombies and even answered community questions as well. If you enjoy good discussion about the Zombies lore, his love for Jason Blundell, and ice-cream, you'll definitely get a kick outta this.
-
2
-
-
9 minutes ago, Koslans said:
Who?
RadAustin is a popular Zombies YouTuber that's been around for years. He's always been that steady-paced guy who never begged for likes and subscriptions, and posted LOTS of in-depth videos like no-clipping maps, lore, all the works.
He's actually a member on here as wel, and such a totally cool guy!
-
Now's your chance to ask the fantastic RadAustin any questions you want him to answer! Whether it be his YouTube stardom, his love for Zombies, or just a question about what cereal he ate this morning, HE WILL ANSWER IT ALL! The CoDz team will interview him Wednesday 11am PST / 1pm EST on Skype, and will have the recording on YouTube, Soundcloud, and Reddit!
Don't be shy - he loves questions, especially when it's about his love for everything Zombies!
-
1
-


Terminus Complete Easter Egg Guide
in Terminus
Posted
Disclaimer: All screenshots / images are re-purposed from videos form public channels. Source links will be provided at the end of this text guide for credit and reference.
-----------------------------------------
Easter Egg Guide
Recommendations, tips and tricks for completing this Easter Egg as easy as possible are available at the end of this post.
STEP 1: Turn on AMP Generators (power) across 3 locations/modules:
Note: These locations will always be marked by a yellow start icon in the match.
Step 2: Activate the Pack-a-Punch machine underwater in the Bio Lab.
Step 3: Obtain the Beamsmasher Wonder Weapon.
Note: There are two ways to get the Beamsmasher: via the Mystery Box, or by completing the side quest. If you intend on doing the sidequest, expand the spoiler below.
Step 3.1: Shoot 5 electrical panels using the Dead Wire Ammo Mod
The 5 locations for the panels can be found in:
Note: After you shoot the first electrical box, you can see where the electricity flows to next. That will help with tracking where to shoot next in case you get lost in this step.
Step 3.2: Obtain the key fob after killing the Tonavsky zombie (pinned on the floor) in the computer room.
Step 3.3: Open the briefcase in the Water Tower control room (where Elemental Pop is) using the key fob to obtain the resonator.
Step 3.4: Take the multiphasic resonator back to the computer room and place on the frequency machine.
Step 3.5: Interact with 3 computers around the main island. There locations are as follows:
Step 3.6: Interact with the frequency machine back in the computer room and solve the math equation.
Note: This step requires some math. If you want to blow through this step, you can use the below calculator. Just enter the symbols you see on the sticky notes and enter the code it gives you on the frequency machine.
https://terminuscodecracker.com
Alternatively, you can go back to the Guard Station and bribe Peck (pay 5,000 essence) for him to give you the code. But you wouldn't do that, would you?
If you want a challenge and want to do some math, three yellow sticky notes will appear once you activate the machine. Each note will contain a symbol that correlates to an X, Y, or Z value on the table in the first whiteboard. In that table, read the digit on the left of the symbol then the digit below the symbol, and that will be the number that symbol represents. For example, in the picture below, the first digit for the X symbol is 1 (going left), and the 2nd digit for the X symbol is 0 (going down). Thus, X = 10. Repeat this for Y and Z.
Next, using your new X, Y and Z values, solve each of the 3 equations in the second whiteboard. Each equation represents the digit you'll be entering in the frequency machine in that sequence. For example, using the picture below again, since X = 10 from earlier, the first equation is 2*10 + 11, which = 31. So the first number you'll enter is 31. Repeat for the other equations. Note that in the third equation, the entire equation is an absolute value. So if your math comes out negative, make it positive and that's the code you'll enter.
Once all three codes have been entered correctly, the codes you entered will flash green and you will see the frequency machine screen turn into a map of the island. If the codes flashed red, you entered the wrong codes and will need to repeat this step again.
Step 3.7: Wait 1 round to pass after completing Step 3.6 and obtain the resonator from the frequency machine.
Step 3.8: Travel to 3 different islands and place the resonator in the big glowing color orb. Kill zombies zapped by the orb, grab the energy ball left behind, and feed it to the big orb.
You will need to repeat this step 2 additional times on Crab Island and Skull Island.
Note: There may be a delay between feeding the 1st energy ball and waiting for the 2nd to appear. You can kill a couple zombies (which spawn infinitely) until another zombies gets zapped.
Step 3.9: After completing the final orb on Skull Island, take the resonator back to the computer room and build the Beamsmasher at the crafting table.
Step 4: Obtain the hard drive from a Tentacle Trap by shooting the trap tentacles with the Beamsmasher and give to Peck/Strauss.
There are 4 possible locations where this hard drive can drop (see list below); however, you can tell which is the right one by finding the trap that has a broken upper grate and a Project Janus keycard on the floor. Make sure you are using the primary beam of the Beamsmasher on the tentacles, and not the alternate beam.
Step 5: Find and enter the 3-digit passcode for the Bio Lab chamber.
After completing Step 4, you can actually begin doing this step and location the digits needed to unlock the Bio Lab chamber. The locations for the digits can be found:
Once you have all the digits, go back to the Bio Lab chamber (center of the entire lab) and enter the digits on the keypad.
Step 6: Turn the Bio Lab chamber dials to release Nathan.
If you are doing this Quest with multiple people, a majority of the squad needs to turn these dials simultaneously. For instance, a 4-person squad only need 3 people to turn the dials.
Note: After Step 6, you will enter the mid-Quest boss fight against Nathan. Be warned that this will lock you in the Bio Lab with infinitely spawning zombies until Nathan is defeated.
Step 7: Obtain the key card in the bottom of the Bio Lab water.
Bonus tip: while you are down here, go to the left where the Pack-a-Punch lift originally was underwater and find a lightly-shaded rock. If you throw/shoot an explosive at it, you will be able to retrieve an oxygen tank. This will be very helpful for the final boss fight.
Step 8: Travel to the bottom of the Ship, climb up the ladder, and obtain the nodes.
Note; Similar to the Nathan boss fight, you will be locked in the Ship room but only have to deal with 3 waves of zombies spawning in. After completing these waves, the hatch where you entered the room from will re-open and you can exit. Note that while you have the node on you, you will be unable to sprint.
Step 9: Take and reconnect the node to 2 of 3 locations that may have a missing pipe connection. Repeat the same for the next node.
There are 3 possible locations these incomplete connections can be:
Note: It will take a couple of seconds to connect each node, which means you'll be susceptible to zombies while completing this step.
Step 10: Return to the Guard Station and obtain the hacking device from Peck/Strauss.
Note: Some players have reported a slight delay with getting the hacker device. Make sure the dialog with S.A.M. and the crew finished, then long-interact with Peck at the Guard Station window until the dialogue reactivates again.
Step 11: Travel to 3 buoys outside the island water and hack each one within the time limit.
Each buoy will flash a yellow light and have satellites on top of them, so you'll know which ones to hack.
You will need to jump into the water and interact-hold with the buoy to hack it. Once you hack the first buoy, the timer will begin to hack the others. During this time while you are hacking, you'll be swarmed by Parasites.
Step 12: Upon the final buoy hack, immediately go back to the Bio Lab and defuse 3 bombs within the time limit.
When you enter the Bio Lab for this step, you will be locked in, similar to the Nathan boss fight. 3 bombs will slow appear in a few windows that you'll need to de-activate. Their locations are always the same:
De-activating the bombs take a LONG time, and you will absolutely be susceptible to zombies. If you are doing this with a 2 or more squad, the bomb progress will SLOW RESET if you do not complete it all the way (bomb progress is halted in Solo). I highly recommend throwing down Decoys/Monkey Bombs and using Aether Shroud to get through them all.
Note: Failure to complete this step will immediately end the game. It's important to be well-prepared before attempting Steps 11-12.
Step 13: Enter the Bio Lab door near Melee Machiatto where the boats spawn for the final boss fight.
Note: Once you enter the boss fight, the next round will "start" but you will be locked in the docks area. It is widely and strongly recommended to have a Chopper Gunner scorestreak, Tier 3 armor, full equipment, mid-level upgraded guns and at least 10k essence before starting this fight.
THIS BOSS IS LONG AND DIFFICULT. But still do-able. Round number does not change the boss health or damage. There are 3 phases to this boss, with an intermittent "break" between each phase. Infinite zombies will be spawning all throughout this fight.
Completing the Quest will allow you to exit the match with Exfil-like rewards or continue playing. If you choose to continue, round-based zombies will return and you will be presented with several rewards such as Wonder Weapons, all perks obtained, rarity upgrade tools, and scorestreaks.
--------------------------------------------------------
Image/video sources:
https://www.youtube.com/watch?v=VvsvyH3h-xk
https://www.youtube.com/watch?v=W2AKsf1IH8M
--------------------------------------------------------
Recommendations
The Terminus Easter Egg has a sharp learning curve to it for most players. Here are some weapon and equipment setups that will help you further succeed in completing this Easter Egg.
WEAPON LOADOUT
The GS45 akimbos are basically Mustang & Sally. Not only will they keep you alive for most of the quest, but they are highlight effective against the final boss, allowing you to hit ANY part of its body and do damage. Not to mention, they will melt the Nathan boss fight as well.
For the final boss fight: Rarity 3 and Pack-a-Punch 2 will do just fine.
The ASG is a heavy-damage gun that shreds Manglers and does good damage on the crit spots of the final boss. Paired with Dead Wire, it can also take down Amagalms easier and still do big damage against manglers.
For the final boss fight: Rarity 3 and Pack-a-Punch 2 will do just fine.
EQUIPMENT LOADOUT
You absolutely will need some kind of decoy tactical to do a couple of steps that involve turning your back on zombies, especially the bomb step. While you can also craft these and Monkey Bombs at the workbench, I highly recommend starting out with some to stack a couple ahead of time before wasting your salvage.
I do recommend the Combat Axe as a lethal simply because it's retrievable and One-Hit-Kills normal zombies. You can stack up to 5 (from my experience), and works very well when trying to conserve ammo during the final boss fight.
Aether Shroud will absolutely help in some of those time-sensitivity steps and help you deliver some nearly-uninterrupted damage on the final boss. Overall a very solid field upgrade to stay alive with.
GOBBLEGUM LOADOUT
Most people would run with Cache Back and Idle Eyes, simply because ammo and time is so precious in BO6. If you're looking to min/max the Quest, however, nothing beats saving salvage and essence like Hidden Power and Wonderbar to skip the tediously-long Beamsmasher side quest or get your primary weapon ready for the boss fight early on. It's up to you what you value most when doing the Quest.
PERK SETUP
Quick Revive is always a must. And with Equivalent Exchange during a squad Easter Egg hunt, you can get back into the fight quicker.
PhD Flopper is also a must if you're going to use the GS45's Pack-a-Punched versions, Sally & Forth.
Stamin-Up will help you escape tight moments easier, which for a map like Terminus, is going to be very handy for you.
In reality, however, you don't need to prioritize much on perks (aside Quick Revive), as you can get free perks by doing some of the side quests in Terminus. The real need for them arrives when it's time for the final boss fight.
OTHER TIPS