
Maggot ridden corpses.
Bug infested swamp.
Hundreds of undead Imperial Army.
Choose your tactic and defend for your lives!
http://i856.photobucket.com/albums/ab125/callofdutyzombieslibrary/World%20at%20War/Shi%20No%20Numa/MapPack2Poster_zps0739e39a.jpg
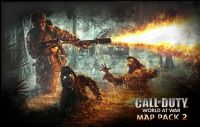
Call of Duty: World at War DLC Map Pack 2
Call of Duty: World at War Map Pack 2 continues to expand the addictive COD multiplayer experience with four new maps. Battle to control the river bridge in "Banzai" a bright jungle map featuring a waterfall and hidden caves. In "Corrosion" face down your enemy in a shattered train yard, and in "Sub Pens" wipe the monsoon rain from your eyes as you struggle over a bombed-out submarine base. The Zombies return in "Shi No Numa" (Zombie Swamp) featuring Perk machines, the deadly new Wunderwaffe DG-2, new Achievements/Trophies and flaming Hell Hounds.
http://i856.photobucket.com/albums/ab125/callofdutyzombieslibrary/World%20at%20War/Shi%20No%20Numa/codwwdlc2_zps955c7593.jpg
=================================
Soldiers,
We’ve got some bad news. The zombie infestation previously plaguing isolated areas within Germany has spread to the Pacific. Communication is shoddy at best, but we’ve pinned what sounds like an SOS signal to a remote jungle location in Japan.
Heavy fog and impassible swamp terrain have left reconnaissance efforts near fruitless. However, we have secured intelligence supporting the survival of an Allied force in the area. The map below was found on the ground near the signal location, but evacuation became necessary as night began to fall.
http://i856.photobucket.com/albums/ab125/callofdutyzombieslibrary/World%20at%20War/Shi%20No%20Numa/CoDWaW_MP2_ShiNoNuma_Map_zps2d39cdfa.png
Our recon squad is made up of some of the toughest and meanest soldiers you’ll ever meet, but they’re smart enough to get out before the dogs start preying at night; those hounds of Hell make their living counterparts seem about as threatening as a bunch of kittens after dinner.
With the war demanding every ounce of strength we can muster, there’s no telling when a full search and rescue operation will be conducted. For now we can only hope that our soldiers in the swamp can hold the zombies off.
=================================
The situation is grim, my fellow soldiers.
Every creaking floorboard, every splash of water, every rustled bush tears at our nerves. They never stop coming. These swamplands will be the death of us.
Equipment
Starting Equipment
- Colt M1911
- Frag Grenades x2
Spawn Room
- Arisaka – 200 / 100
- Gewehr 43 – 600 / 300
Warning Room
- Stielhandgranate x4 – 250
- M1 Carbine – 600 / 300
Courtyard
- Bouncing Betties x2 – 1000
Downstairs
- Thompson – 1200 / 600
- M1897 Trenchgun – 1500 / 750
- M1 Garand – 600 / 300
Storage Hut
- Type 100 – 1000 / 500
Comm Room
- STG-44 – 1200 / 600
Fishing Hut
- MP40 – 1000 / 500
Doctor's Quarters
- M1918 Browning Automatic Rifle – 1800 / 900
Perks
- Juggernog – More health – 2500
- Speed Cola – Quick reloads – 3000
- Double Tap – Higher rate of fire (MG's only) – 2000
- Quick Revive – Revive teammates more quickly – 1500
Pick-ups
- Ka-Boom – Instantly kill nearby zombies
- Max Ammo – Refills ammunition for all weapons
- Insta-Kill – One hit kills for a brief duration
- Double Points – Actions reward twice the points for a brief duration
=================================
Essential Survival Tactics
Due to its large size and multiple points of interest, Shi No Numa presents players with many options. There is no one single tactic that trumps all others. However, before outlining a few of our favored strategies, there are several key concepts that must be adhered to if you've got any hope for survival.
Communication!
Communication is absolutely essential. While this is key for all Nazi Zombies maps, Shi No Numa elevates the necessity to new heights. Different players prefer different strategies and if communication is lacking, your team will fall apart in the later rounds when people start running in separate directions.
Plan your route early on so that your team doesn't disconnect when the zombies start pouring in. However, adaptability is key! Keep in mind that at times it may be necessary to adjust your plan on the fly. Vocalize these changes to your teammates! Disorganization and wasted time have been the downfall of many teams.
If you're covering an area and the situation seems to be escalating out of your control, announce your troubles immediately, preferably before it's too late for your teammates to do something. You need to consider that everyone is busy keeping the zombies away at their post and may take a moment or two before help arrives. Holding out like a hero more often than not ends in a failed round. Talk to your teammates!
Mobility!
Shi No Numa requires rapid team mobility. Teams usually wait to move from one location to the next in between rounds, but this is not always ideal. When points allow these excursions, speed is key. Take advantage of the Insta-kill and Ka-Boom drops by utilizing the window of safety they provide to move to your new location during a round. This will allow you to pick up or reclaim a much-needed Perk, and at the end of the round provides another chance to either rush for another Perk or return to your favored camp point.
Points!
Without points, your time in Shi No Numa will be very, very brief. Yet at the same time this doesn't mean you should spend your points at every chance. While there are actions you can take to win more points in the crucial first rounds, some players become blind to anything but their own point score. This hinders your team! Your chances of survival are much lower if your teammates cannot afford to upgrade their arsenal appropriately throughout the rounds.
When a door needs to be opened, generally the player with the most points should open it. However, if there's a player that's better equipped with a lower point pool, they should offer to open new pathways so the other players can equip themselves. In short, being courteous to your fellow soldiers will benefit you more in later rounds when survival is so dependent on strong communication and camaraderie.
Weapon Choice!
The process of upgrading weapons varies distinctly between two separate schools of thought. In one, the location of the Mystery Box determines the group's path throughout the match. Players will take turns opening the box throughout the rounds as points allow until the Teddy Bear appears and it moves to a new location. The team then follows the light to determine where the box has moved and when appropriate, high tails over to the new location, repeating the same process until the Teddy Bear again appears. With this tactic, the team is hoping to score a heavy hitting weapon in the early game.
On the other side, some teams favor freedom of mobility and high point accumulation to the Mystery Box and its luck of the draw point drain. As Perks become more and more necessary throughout the rounds, some prefer to acquire those Perks more quickly than spending their early points on a game of chance. This can also free up money for the purchase of Bouncing Betties. Betties can prove invaluable if placed in locations outside of the zombies' normal path of attack. If you get caught in a tight spot with a group of zombies, simply run behind the Betties and watch as the zombies get torn to pieces.
These are both strong options. Just know that if you decide to skip the Mystery Box in the beginning, you will still need to start searching it for more powerful guns (HMG, Ray Gun, WunderWaffe) later in the match, as your team will struggle immensely in the late game if nobody is equipped with them. This decision again comes down to preference, and the team together should decide on which tactic to adhere to.
Dogs!
Shi No Numa's loving addition to Nazi Zombies mode, these hellhounds will most often first appear between rounds 5 – 7, with some occasional leeway on either end. After that, there is a three round grace period between dog attacks, with further rounds having the chance of throwing either zombies or dogs your way.
You can tell when a dog round is about to begin when the fog thickens, the music changes, and one of the four soldiers comments about it. When this happens, the first thing you should do is find a tight corner that the entire team can hunch into. Staying out in the open and separated will almost always end in defeat. Find a tight corner, with two soldiers standing in the back and two kneeling up front.
When a ball of lightning and smoke appears, that means a dog is about to materialize and come after you. Tightly packed together, preferably using automatic weapons, there's usually enough combined firepower to defend against the vicious attacks. Don't hesitate to use grenades or lure them into Bouncing Betties if things get hectic. Just remember that grenades can hurt you, but Betties can't.
http://i856.photobucket.com/albums/ab125/callofdutyzombieslibrary/World%20at%20War/Shi%20No%20Numa/CODWW_ZombieSwamp_2_zps4821d344.jpg
Traps!
Traps can be extremely helpful in tight situations. Unfortunately, they are often activated after chaos erupts. This is often due to each teammate's understandable unwillingness to spend their hard earned points on trap activation.
Again, strong team communication can prevent this from happening. If the players guarding the front entrance to a hut find themselves overwhelmed, or similarly in the Courtyard, vocalize the situation before things get too hectic and quickly determine who can spare the points.
http://i856.photobucket.com/albums/ab125/callofdutyzombieslibrary/World%20at%20War/Shi%20No%20Numa/rez-ps3-large_zpsd7c8daac.jpg
=================================
Round Analysis
Rounds I - IV
While slow-paced, the first four rounds are fundamental for two reasons. First, your accumulation of points in the early game helps determine how quickly you'll be able to upgrade once unlocking the Downstairs area, either by stairs or the Warning Room. While shooting down the approaching zombies from a distance will gain you some points, there are better tactics.
Taking down zombies with your knife and repairing window boards will earn you more points than simply shooting them down as they lumber toward your window. With some practice, you'll soon begin to get a feel for how many bullets each zombie can take from your pistol before hitting the ground (headshots excluded).
Instead, weaken them with a few rounds, let them approach your window and yank off some boards, and then finish them off with your knife before they can enter the Spawn Room. You have now gained 10 points for each shot on their body, 130 for finishing them with a melee attack, and 10 for each board you repair.
It's very important that you announce to your teammates your intent to use this tactic, otherwise they may think you're in trouble and try to help you out, losing you valuable points in the process. Additionally, if you begin to get overwhelmed, let the nearest teammate know so they can help get you back to a safe standing.
Secondly, the early game presents the best opportunity to get to know your teammates. Find out what strategies they like to use and formulate a general plan right from the start to avoid confusion later in the match.
Rounds V - IX
Some players will tell you that opening the stairs is the best route toward the Downstairs area, while others will tell you that opening the Warning Room is right choice. This is really a matter of preference, and the best choice is the one that the team is most comfortable with. Opening the stairs gives you a bit more room to run around and spread out if the zombies become too concentrated, but a lack of awareness and/or communication can lead to attacks from the rear.
On the other hand, opening the Warning Room allows you to back up by the stairs, lending a small corner that protects from attacks to the rear. While this allows the team to bunch up together for more focused firepower, it also means that the amount of zombies rushing in from the Courtyard will dramatically increase.
These rounds will also provide your first real set of upgrades. I suggest when moving Downstairs to avoid throwing your money into the Mystery Box right away and instead picking up the Thompson or Trenchgun. The Thompson costs less and will net you points more quickly than the Trenchgun, but on the other hand the Trenchgun in the hands of a skilled player will outlast the Thompson's usefulness.
Whichever choice you make, know that toward the end of the VII or VIII round you should consider moving toward one of the outer huts. The Teddy Bear should have popped up by now if your team has consciously been gambling in an attempt to move it. Additionally, before moving on, you should ideally have replaced your pistol and rifle (if you purchased one in the early rounds) with better options, either a combination of the Trenchgun and Thompson or one of the two with a Mystery Box upgrade.
Rounds X - XVI
These rounds should focus on collecting Perks from the Perks-a-Cola machines in the outer huts of Shi No Numa. As a team, select one of the four huts to visit and make your way through the swamps as quickly as possible. Have two soldiers looking forward as you progress while two others watch the rear for ambushing zombies. If you look in the sky, you can see a pillar of light that indicates which hut contains the Mystery Box; it's always a good idea to head towards the Mystery Box.
Once inside a hut, have everyone buy a Perk and load up on new weapons if needed. Two soldiers should guard the back windows while the other two guard the front door. Plant some Bouncing Betties around the hut and wait for the next wave. If given a chance, use the Mystery Box to try and grab the Wunderwaffe or a Machine Gun. In the later rounds, these weapon advancements are vital for survival.
If things get dicey in the hut, have one soldier switch on the electricity grid to block off the front doors from zombies. Retreat to the back of the hut and have all soldiers huddle together while the team recovers. If an Insta-Kill power-up appears, try to grab it and use its added effect to fight your way back to the main house. Once at the main house, try to find a secure location in the first floor and defend it with your upgraded weapons and Bouncing Betties.
Keep on racking up the points while killing zombies and then when everyone thinks it's safe, venture to the other huts to collect more Perks. Also use this time to try and get everyone equipped with either Ray Guns or HMGs via the Mystery Box. In the upcoming rounds, everyone will need to be well equipped to survive the encroaching onslaught.
Rounds XVI - Beyond
If you have made it this far, we can assume that you have some pretty decent teamwork and communication between soldiers. That's good, because these later rounds will really test how well you perform as a team.
Keep the communication lines going and remember that you are only as strong as your weakest link. Around this time, it is good to start designating classes to certain players. At least two soldiers should be heavy weapons specialist to mow down the hordes while another should be wielding either the Ray Gun or the Wunderwaffe. The last soldier's weapons can be up to you, but this soldier should definitely have the Quick Revive perk and be designated as team medic. Spend your time in these later rounds securing a corner in the Downstairs area with Bouncing Betties and then venturing out to the Huts only when needed. Lastly, don't forget to have fun. Congratulations, not many soldiers make it this far.
http://i856.photobucket.com/albums/ab125/callofdutyzombieslibrary/World%20at%20War/Shi%20No%20Numa/ShiNoNumaPoster_zps871fd318.jpg

Recommended Comments
There are no comments to display.